使用 Vue3 + vite + elementUI 开发一个 Utools Markdown 编辑器插件
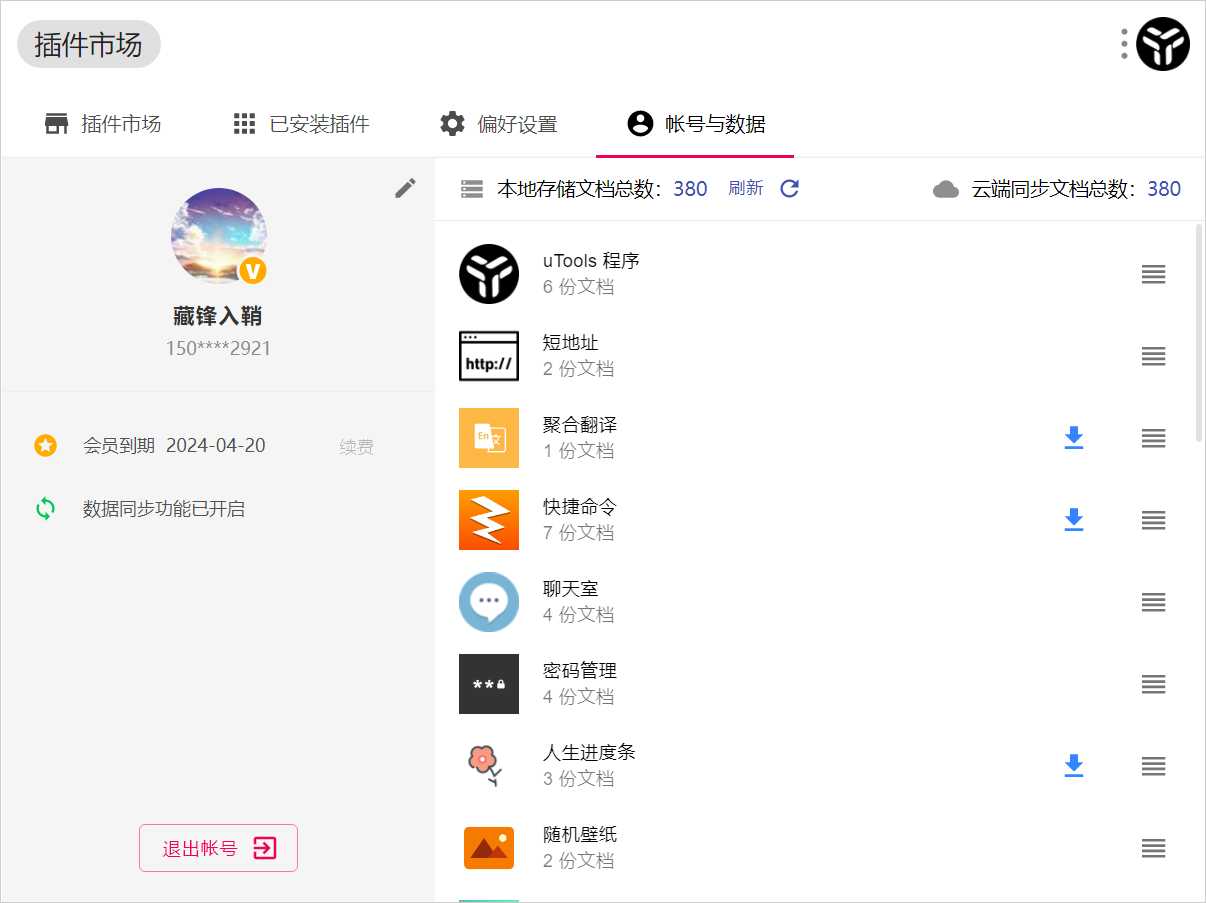
目的 博主个人已经用了很久的 Utools 了,会员也续到了 2024 年,它跟随博主从 Deepin 到 Manjaro,再到 Windows 再到 MacOS,在很多场景下都非常方便,比如选中文本中键翻译、复制 JSON 后自动格式化、正则表达式匹配小工具、计算稿纸等。已推荐给很多同事、朋友使用,无不夸其高效便捷。 Utools 为实现多端兼容,主要使用 JS 开发插件 ,界面 UI 与组件交互与传统的 web 开发别无二致,只不过可以利用更多的系统能力去做传统 web 开发不能做到的事情。
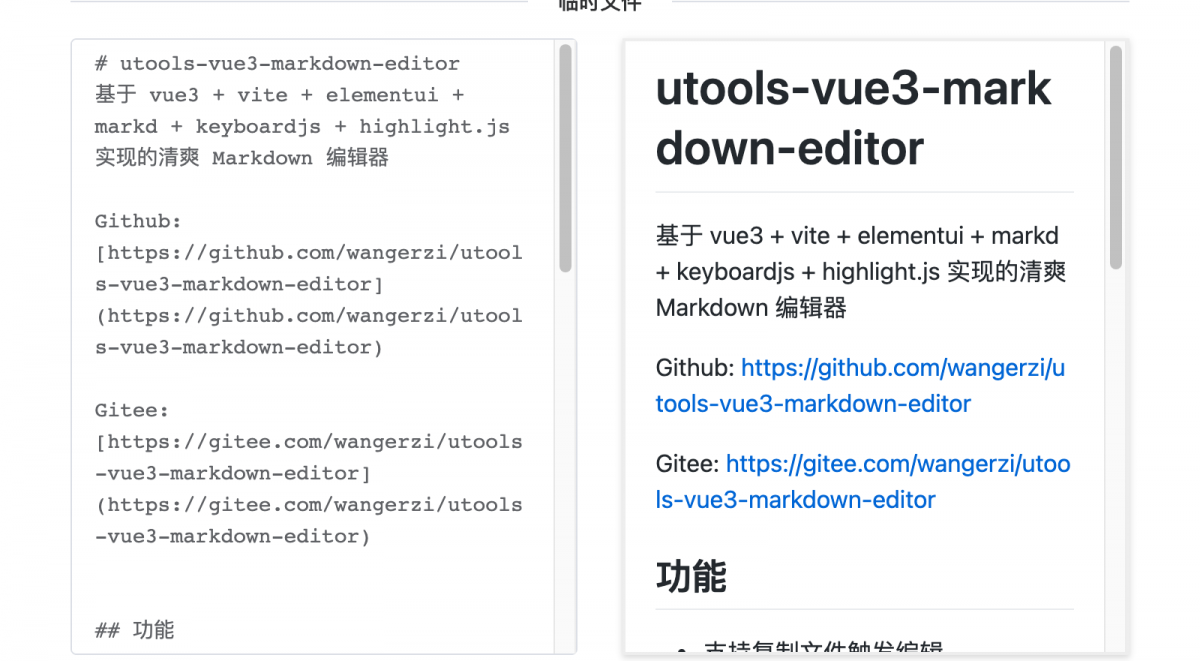
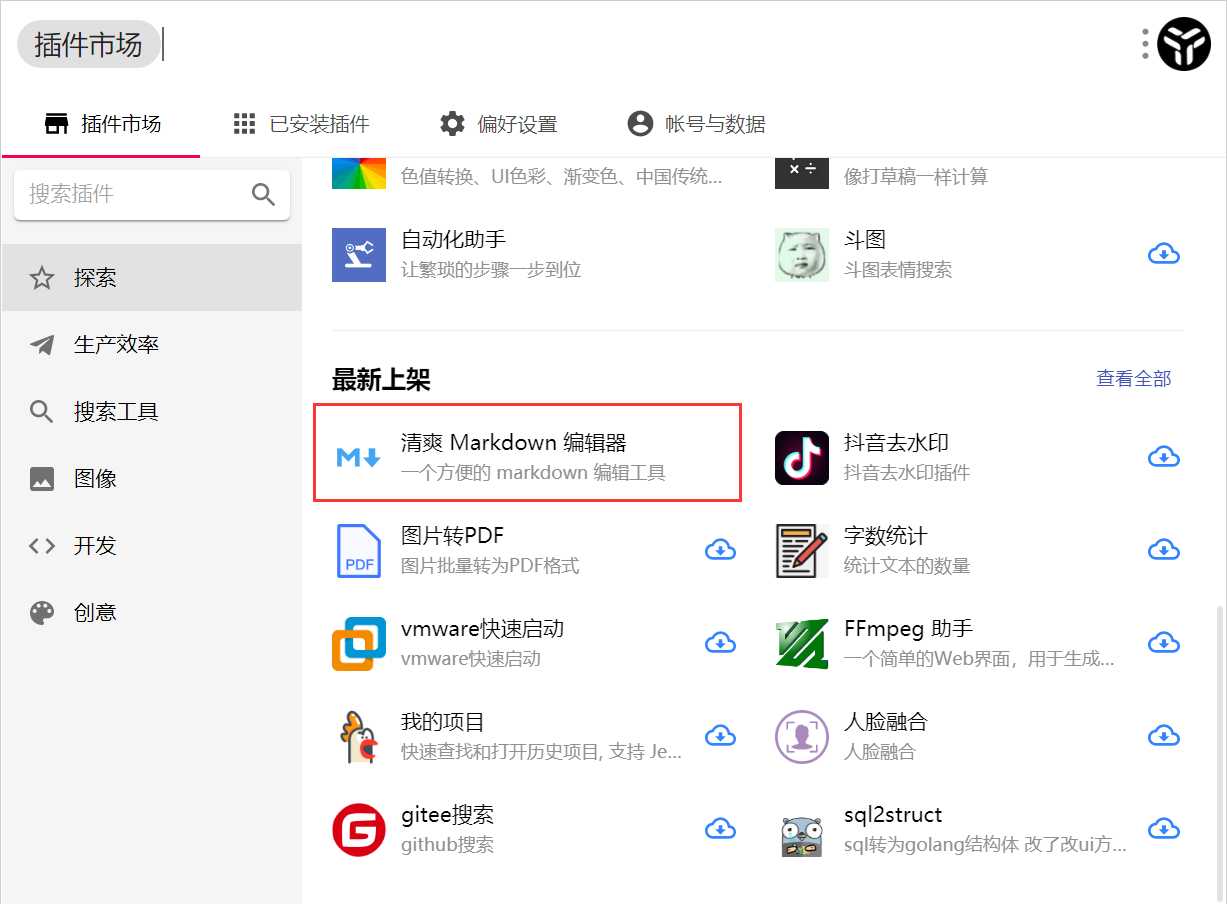
开发文档整理 Utools 开发者文档:http://u.tools/docs/developer/welcome.html ElementUI开发文档:https://element-plus.org/#/zh-CN/component/installation Vue3 开发文档:https://v3.vuejs.org/guide/introduction.html Vite 开发文档:https://vitejs.dev/config/ 在开发者文档中,快速上手仅提供了原生 JS + utools 能力的调用结合,这篇文档的目标是将 Vue3 与 Utools 开发结合,并将国内比较流行的 ElementUI 框架集成在一起 ,最终会基于这些技术创造出一个简易的 Markdown 编辑器,Utools 上搜索 『清爽 Markdown 编辑器』 即可体验。 https://github.com/wangerzi/utools-vue3-markdown-editor Gitee:https://gitee.com/wangerzi/utools-vue3-markdown-editor 界面效果如下: https://github.com/xiaou66/utools-pictureBed https://github.com/xkloveme/utools-calendar https://github.com/in3102/upassword
基础工具的集成 这一小节的目的主要是将业务框架和主要依赖安装好,为实现业务做准备。 空白项目只有一个 README.md 和 .gitignore 本阶段的配置和代码执行已放入 https://github.com/wangerzi/utools-vue3-markdown-editor/tree/element-template ,如果想基于同样的技术栈做研发,可以直接把代码下载下来改。
初始化项目 首先,这是一个 vue3 + vite 的项目,根据官方的 快速上手指引 ,在项目根目录下执行如下指令,注意对比执行结果和 node 版本
其中 mv utools-vue3-markdown-editor/* ./ 是因为项目初始化在子文件夹中,不在主目录初始化是因为会删除该目录所有文件,而空白项目中已经有 .git/README.md/.gitignore 了,初始化到本目录中,会导致这些数据被清理掉,规避风险所以创建在了子目录中。
1
2
3
4
5
6
7
8
9
10
11
12
13
14
15
16
17
18
19
20
21
22
23
24
25
26
27
28
29
30
31
32
33
34
35
36
37
38
39
40
41
42
43
44
45
46
47
48
49
50
51
52
53
54
55
$ node -v $ npm -v $ npm init vite utools-vue3-markdown-editor -- --template vue $ mv utools-vue3-markdown-editor/* ./$ rm -rf utools-vue3-markdown-editor\$ npm install > esbuild@0.12.18 postinstall D:\phpStudy\WWW\github\utools-vue3-markdown-editor\node_modules\esbuild > node install.js $ npm run dev > utools-vue3-markdown-editor@0.0.0 dev D:\phpStudy\WWW\github\utools-vue3-markdown-editor > vite > Local: http://localhost:3000/ > Network: use `--host` to expose
此时访问 http://localhost:3000/ 将会看到如下界面,表示项目初始化完成
框架引入 下一步引入 element 框架,主要参考 官方安装文档 执行如下指令
1
2
3
4
5
6
7
8
9
10
11
12
$ npm install element-plus --save
按需引用和 SASS 由于 vite 、 webpack 等打包工具会用 tree-shaking 剔除未使用的代码,做按需引用可最大程度的利用此功能,减少打包体积。ElementUI 官方也提供了 element 按需引用的使用说明 。 这一步的目的是安装 vite 的 style 引入插件,并安装 sass 和 sass-loader 以兼容 sass 的加载,执行如下指令:
1
2
3
4
5
6
7
8
9
10
11
12
13
14
15
16
17
18
19
20
21
22
23
24
25
26
27
$ npm install vite-plugin-style-import -D $ npm install sass sass-loader
编辑 vite.config.js,调整为如下格式,这一步的目的有两个
指定明确的开发端口,这在 utools 的开发配置中也将有所体现
按需加载 elementUI 的 .scss 文件处理
1
2
3
4
5
6
7
8
9
10
11
12
13
14
15
16
17
18
19
20
21
22
23
24
25
26
27
28
import {defineConfig} from 'vite' import vue from '@vitejs/plugin-vue' import styleImport from 'vite-plugin-style-import' export default defineConfig ({base : './' , server : {port : 3000 ,plugins : [vue (),styleImport ({libs : [{libraryName : 'element-plus' ,esModule : true ,ensureStyleFile : true ,resolveStyle : (name ) => {slice (3 )return `element-plus/packages/theme-chalk/src/${name} .scss` resolveComponent : (name ) => {return `element-plus/lib/${name} `
随后,修改 src/main.js,在其中添入按需引入的 ElementUI 插件和 base.scss
1
2
3
4
5
6
7
8
9
10
11
12
import { createApp } from 'vue' import App from './App.vue' import { ElButton , ElSelect } from 'element-plus' import 'element-plus/packages/theme-chalk/src/base.scss' const app = createApp (App );component (ElButton .name , ElButton )component (ElSelect .name , ElSelect )mount ('#app' )
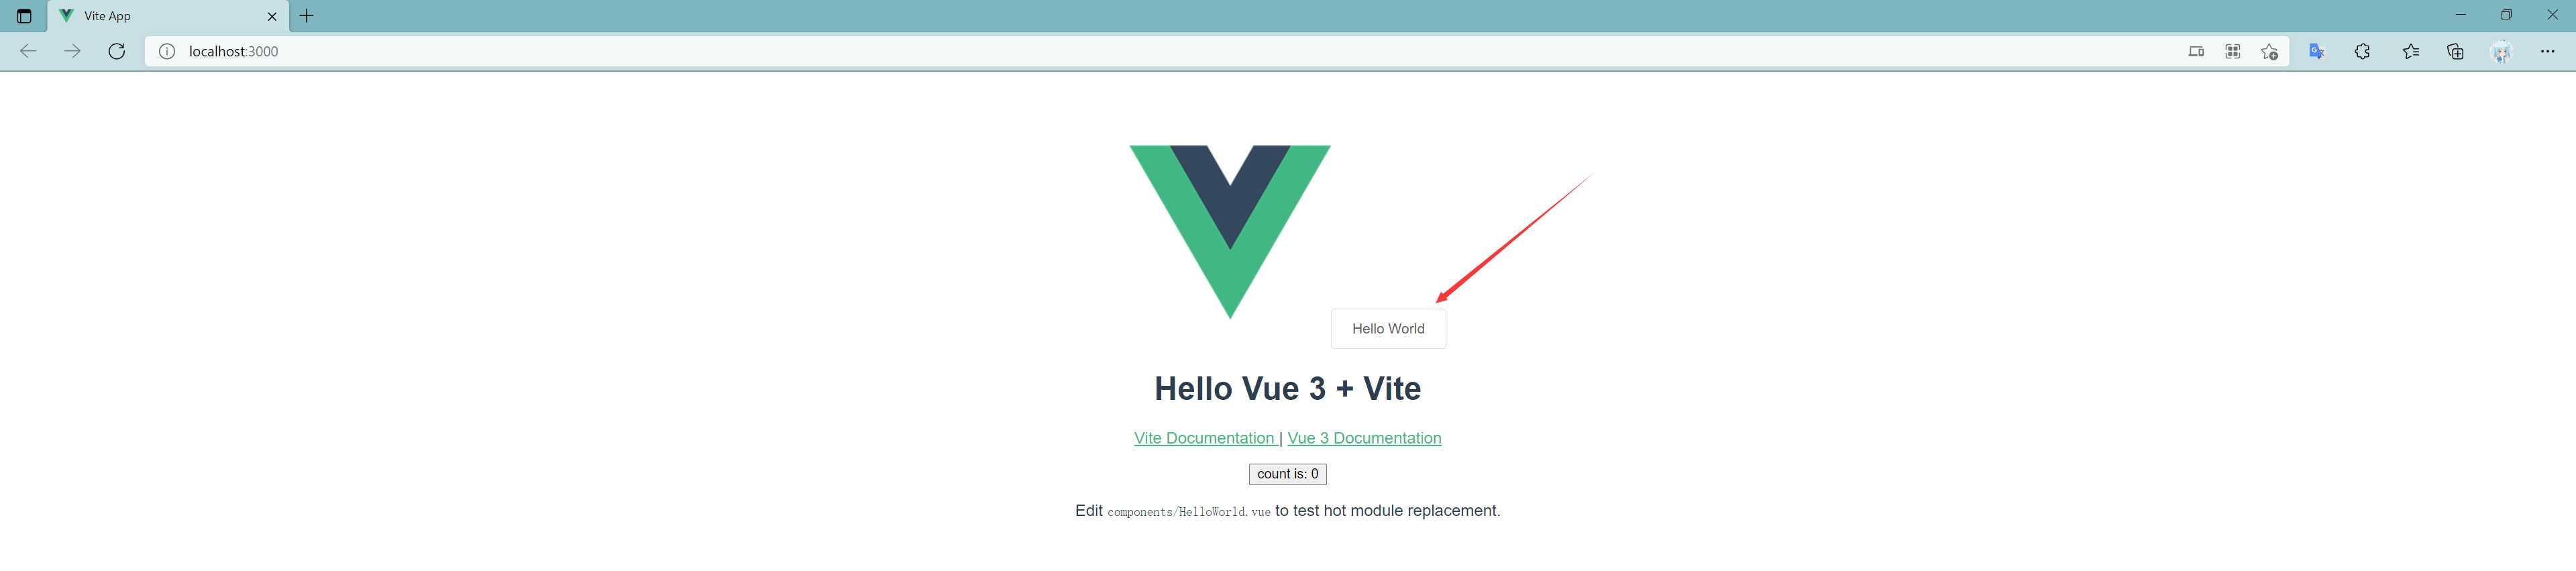
引入验证 在 src/components/HelloWorld.vue 中小改一下
1
2
3
4
5
6
7
8
9
10
11
12
13
14
15
16
17
18
19
20
21
22
23
24
25
26
27
28
29
30
31
32
33
34
35
36
<template>
执行 npm run dev 并访问 http://localhost:3000/,看到 ElementUI 风格的按钮展现在页面上即表示成功
上面的步骤操作完毕后,开发框架和基础目录都已经建好了,但 utools 与传统 web 开发有区别的地方在于,它可以利用客户端的能力,并能在 utools 中快速调用,所以我们需要定义两个文件 plugin.json 和 preload.js 用来指定插件的配置,封装插件可使用的客户端能力。 官方配置文档:http://u.tools/docs/developer/welcome.html 由于我们调试环境是运行在 localhost:3000 上的,utools 也考虑到了这种调试需求,根据文档可以做出配置 而这次要实现插件可以由两个入口进入,可定义两个 feature
关键字 『markdown 编辑器』进入主页面
复制后缀名为 .md 的文件后,唤醒 utools,我们将会自动读取对应文件并做相关编辑
考虑到 打包后的 plugin.json 和 preload.js logo.png 均需要出现在 dist/ 目录下 ,所以我将这三个文件都放到了 public/ 中,这样打包后这三个文件将会出现在 dist/plugin.json 、 dist/preload.js dist/logo.png,符合打包要求,utools 需要加载的目标文件就是 dist/index.html,所以 plugin.json 中的 main 配置写 index.html 即可。 logo 去 https://www.iconfont.cn/ 随便找了个跟文本编辑相关的拿来用了 public/plugin.json
1
2
3
4
5
6
7
8
9
10
11
12
13
14
15
16
17
18
19
20
21
22
23
24
25
26
27
28
29
30
{ "main" : "index.html" , "logo" : "logo.png" , "platform" : [ "win32" , "darwin" , "linux" ] , "preload" : "preload.js" , "development" : { "main" : "http://127.0.0.1:3000" } , "features" : [ { "code" : "main" , "explain" : "一个方便的 markdown 编辑工具" , "cmds" : [ "markdown 编辑器" ] } , { "code" : "copy" , "explain" : "复制文件预览及编辑" , "cmds" : [ { "type" : "files" , "label" : "markdown 文件预览" , "fileType" : "file" , "match" : "/\\.md$/i" , "minLength" : 1 , "maxLength" : 1 } ] } ] }
preload 先简单写一个 console,具体需要用到 node / electron 相关能力了,再回来补全。 public/preload.js
1 console .log ("preload js loaded" )
运行 npm run dev 尝试下打包:
1
2
3
4
5
6
7
8
9
10
11
12
13
14
$ npm run build > utools-vue3-markdown-editor@0.0.0 build D:\phpStudy\WWW\github\utools-vue3-markdown-editor > vite build
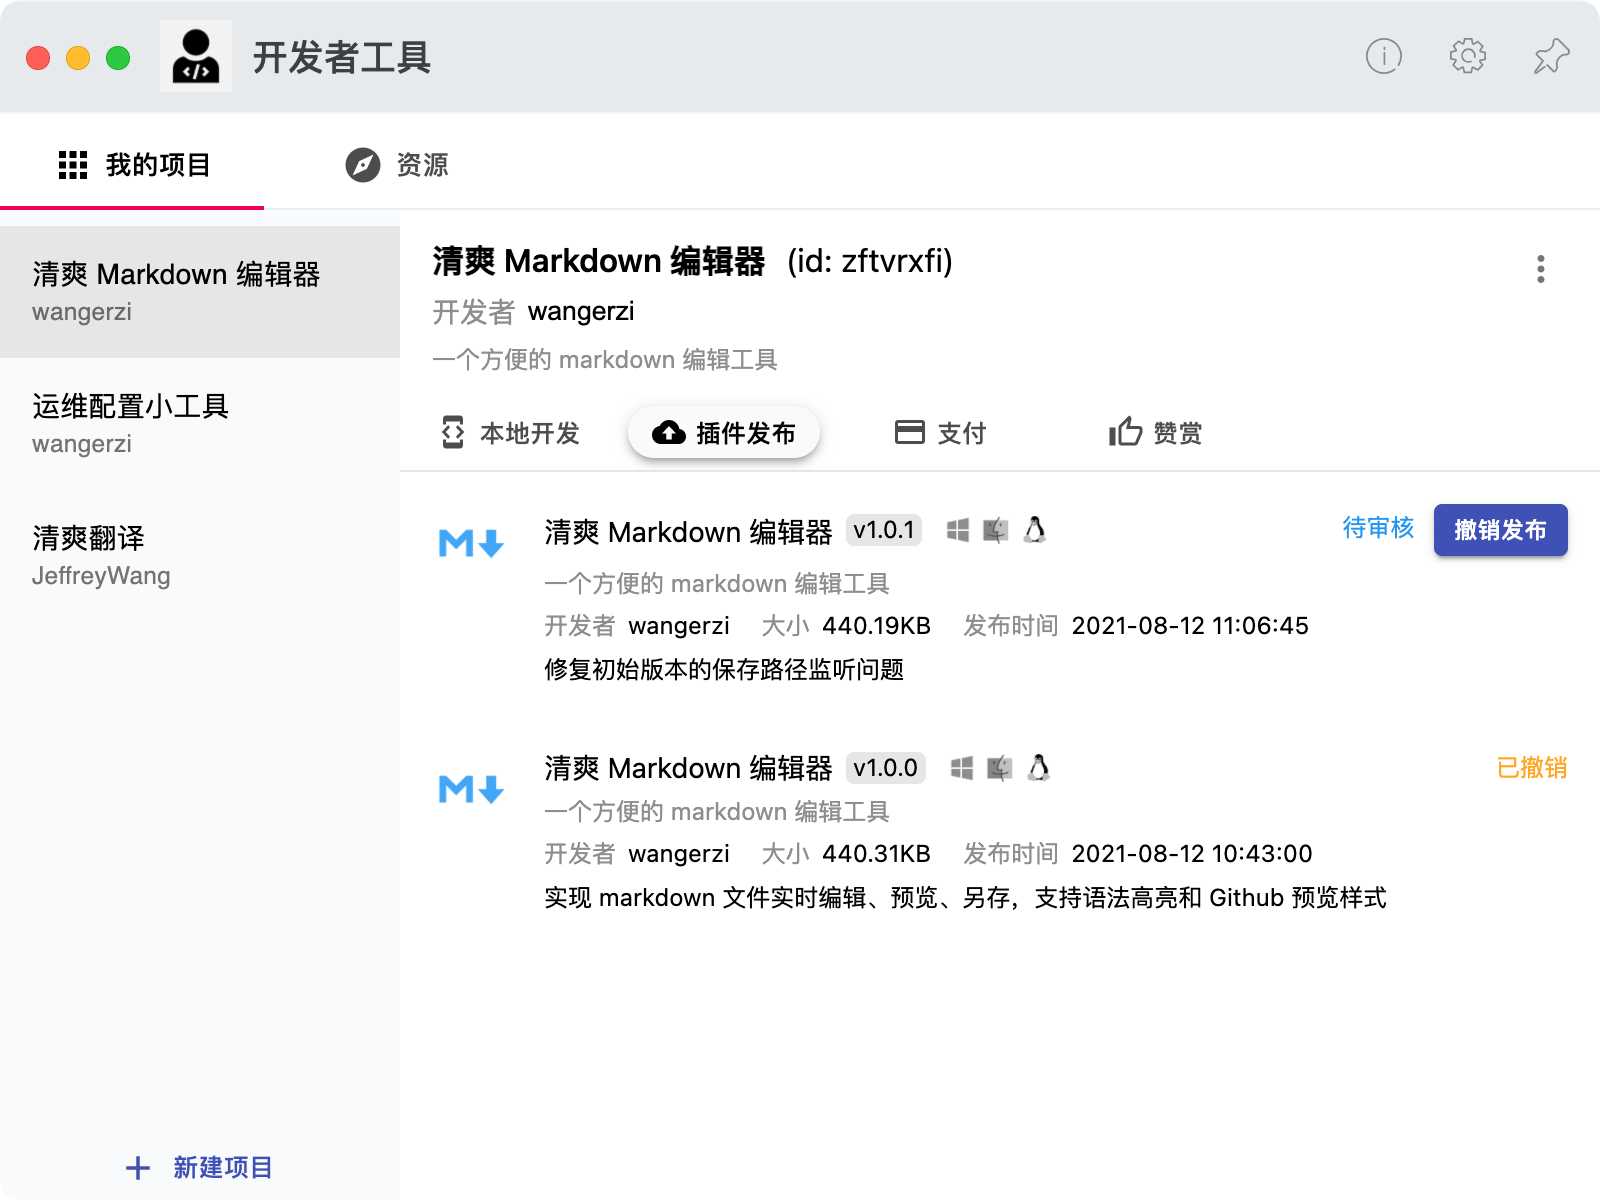
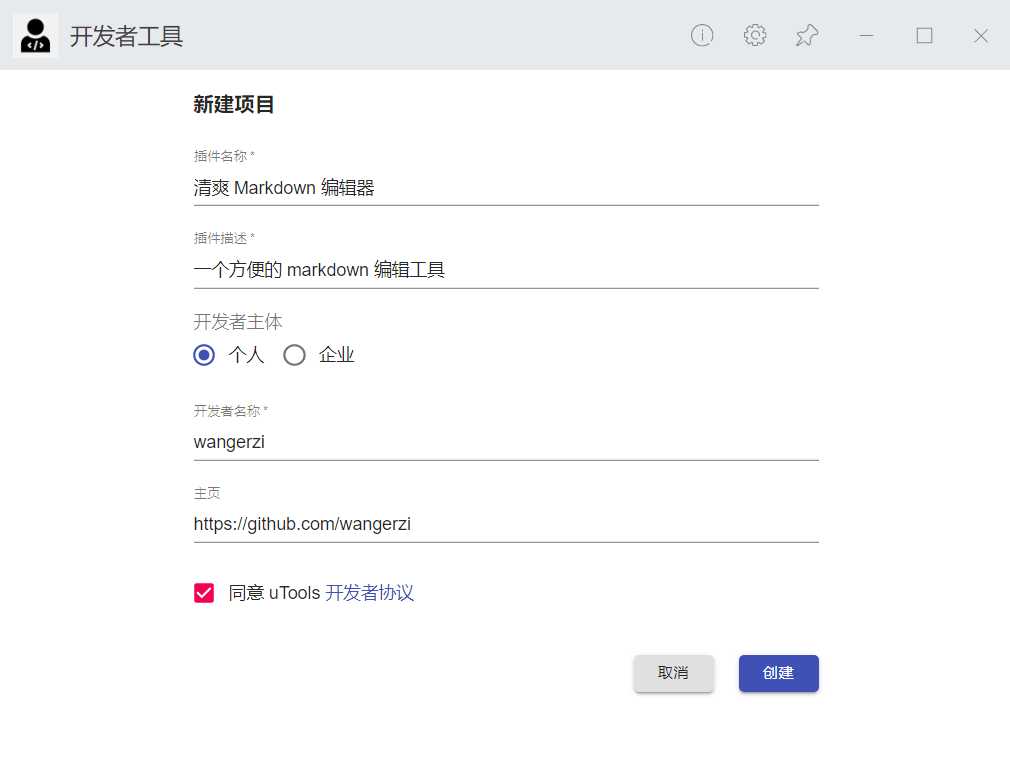
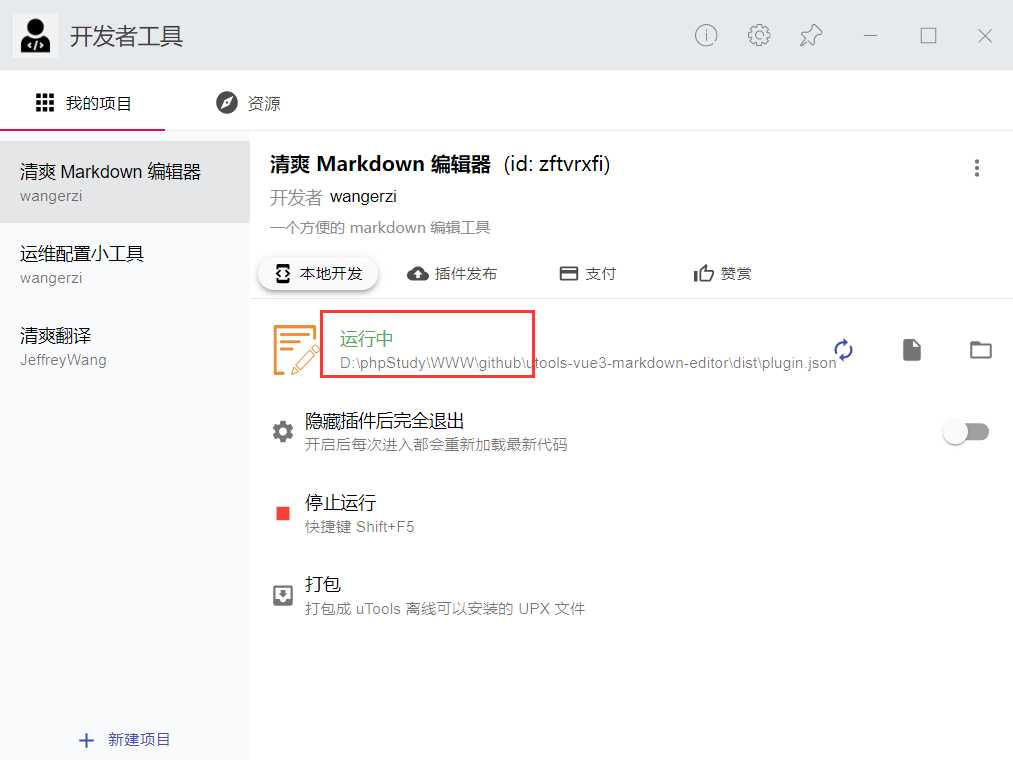
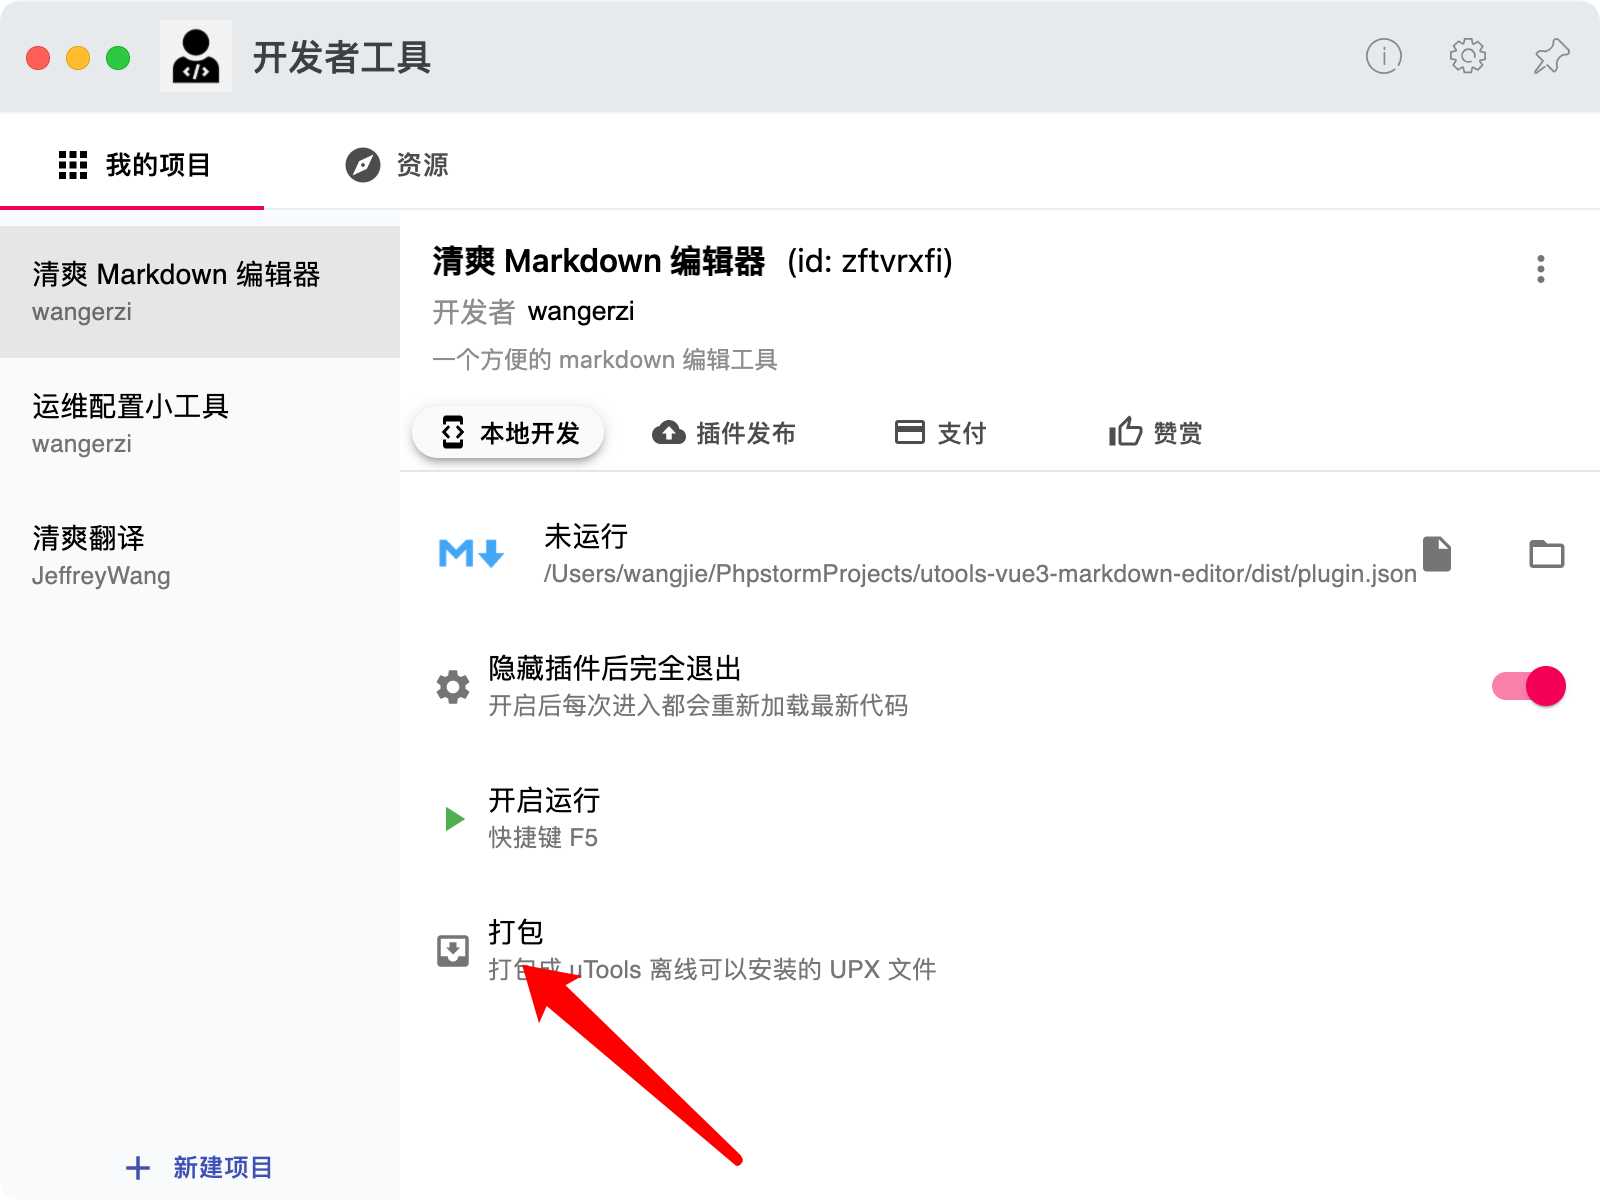
调试和打包插件 首先去 utools 插件中搜索『开发者工具』,打开后点击新建项目,补齐相关信息 npm build 后,会产生一个 dist/ 目录,将其下的 dist/plugin.json 拖到开发者工具中,点击运行 plugin.json 中制定了 development.main 为 localhost:3000,所以在调试期间需要 npm run dev 把 devserver 跑起来
1
2
3
4
5
6
7
8
9
10
11
12
13
14
15
16
17
18
19
20
$ npm run dev > utools-vue3-markdown-editor@0.0.0 dev D:\phpStudy\WWW\github\utools-vue3-markdown-editor > vite > Local: http://localhost:3000/ > Network: use `--host` to expose
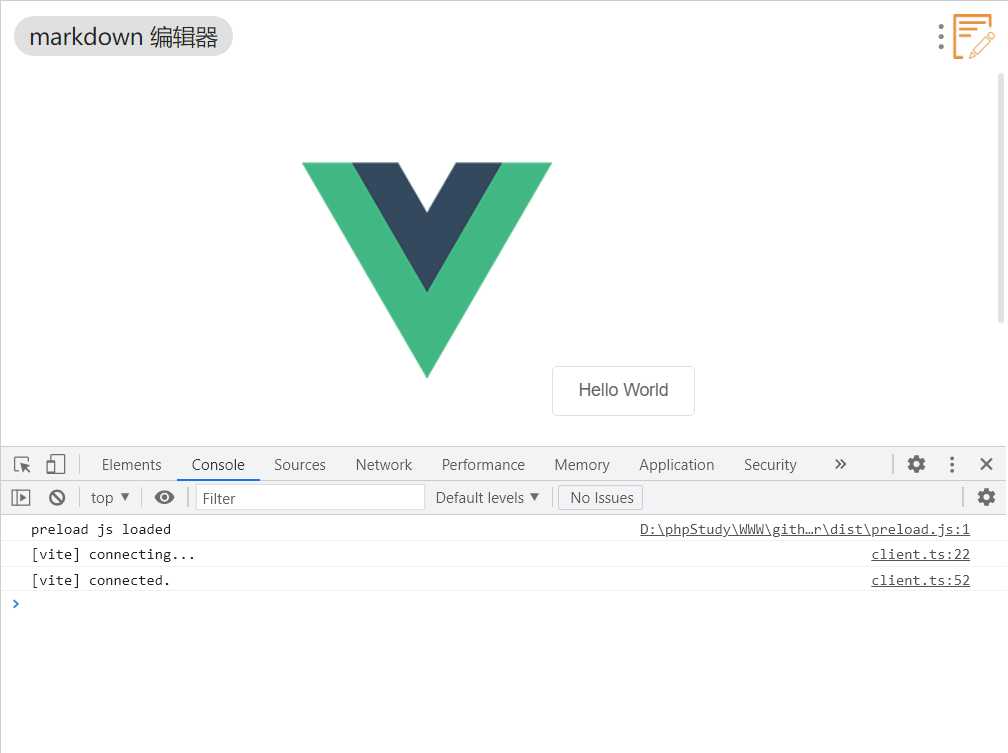
然后 utools 中输入关键字 『markdown』即可看到处于 dev 状态下的插件 preload.js 正常运行,输出了 『preload js loaded』
注意:指定的 plugin.json 为 dev/plugin.json,所以 public/plugin.json 、 public/preload.js 有任何修改,需要手动复制或者 npm run build 重新打包,然后 utools 开发者工具点击按钮刷新 plugin.json 即可。
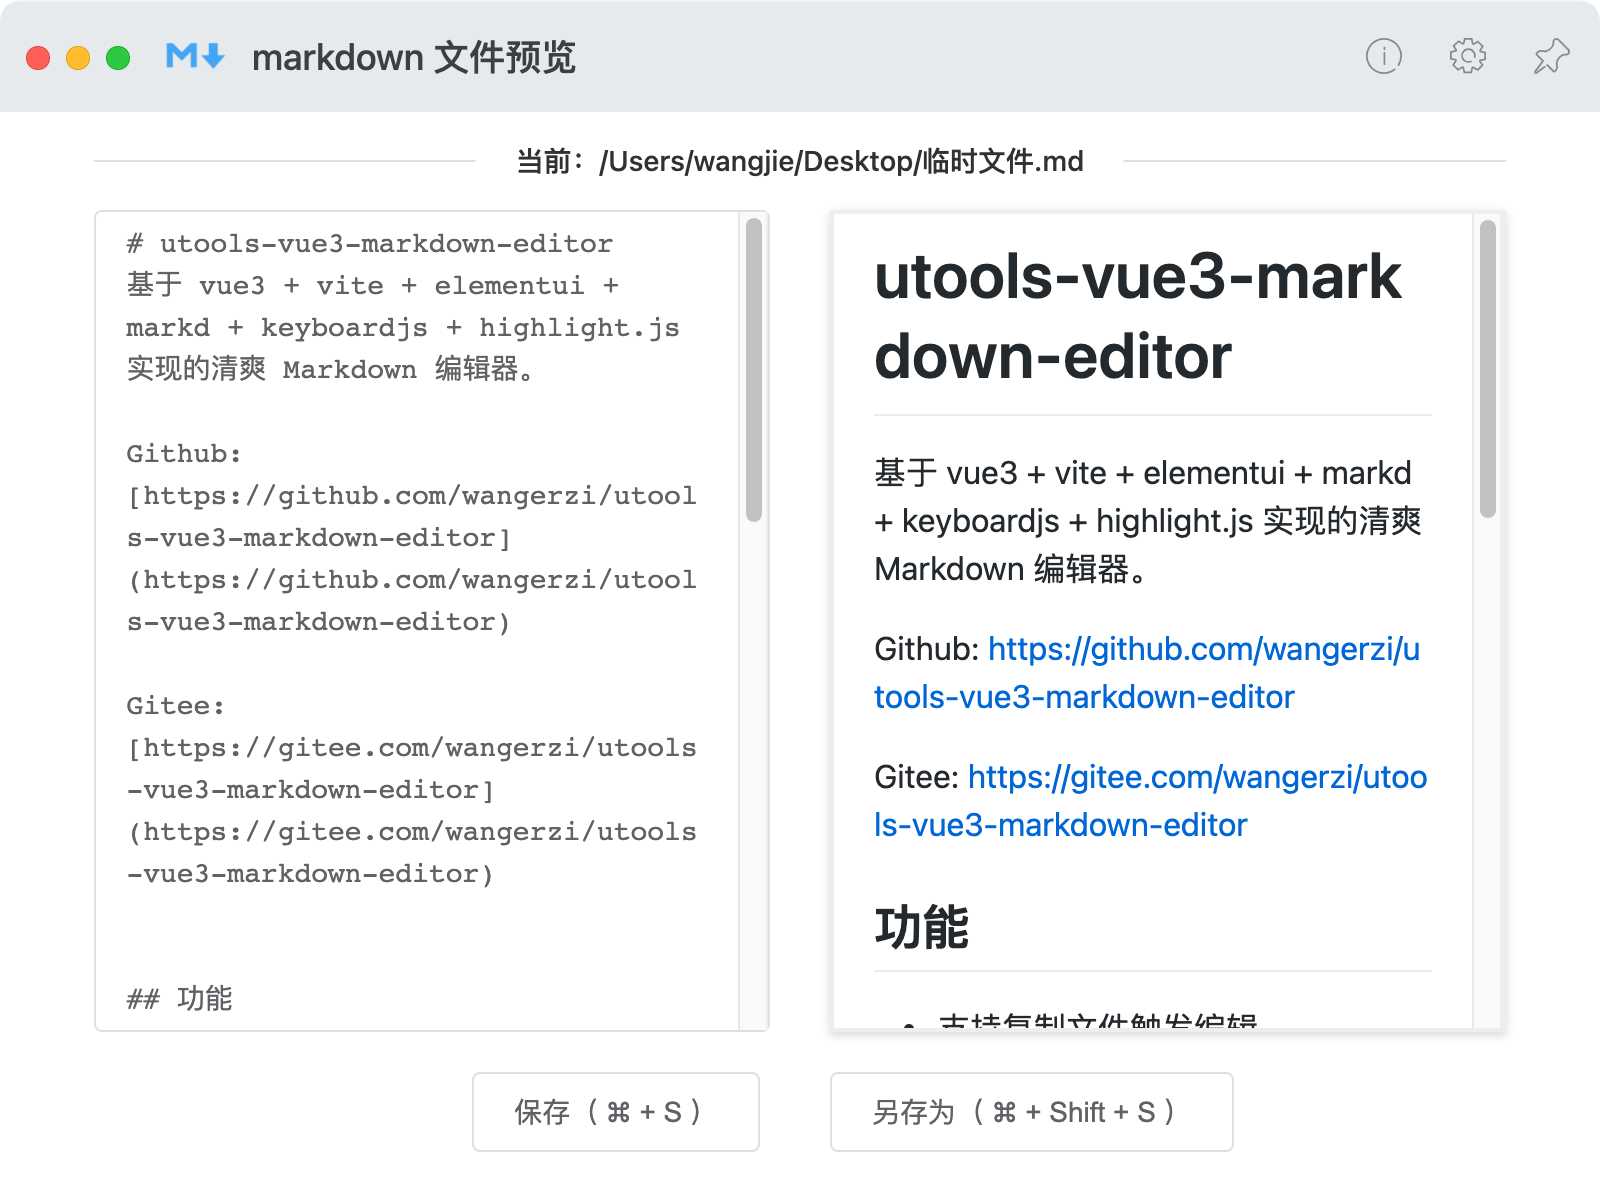
功能实现 功能整体比较简单,左侧为编辑区,由 textarea 实现,右侧为预览区,实时渲染左侧编辑区域的 markdown 语法的结果,下方为两个控制按钮,分别是保存和另存。
依赖库的安装调用 1 2 3 4 5 6 7 8 9 10 11 12 $ npm i marked keyboardjs github-markdown-css highlight.js
布局实现 由于此应用单页即可完成,所以简单改造下 src/App.vue 和 src/components/HelloWorld.vue 即可,其中 HelloWorld.vue 在项目中被重命名为了 Editor.vue,目录结构如下图所示:
Editor.vue 模板部分用了 Element 的 el-row 和 el-col,规划好基础布局
1 2 3 4 5 6 7 8 9 10 11 12 13 14 15 16 17 18 19 20 21 22 <template>
样式部分,手动做了些阴影和高度、换行限制
1 2 3 4 5 6 7 8 9 10 11 12 13 14 15 16 17 18 19 20 21 22 23 24 25 26 27 28 <style scoped>
处理逻辑里边,使用了 vue3 的 setup api,定义了 state.path 和 state.content 两个关键的响应式变量,调用了 markd, highlight, keyboardjs 等项目实现功能。
1 2 3 4 5 6 7 8 9 10 11 12 13 14 15 16 17 18 19 20 21 22 23 24 25 26 27 28 29 30 31 32 33 34 35 36 37 38 39 40 41 42 43 44 45 46 47 48 49 50 51 52 53 54 55 56 57 58 59 60 61 62 63 64 65 66 67 68 69 70 71 72 73 74 75 76 77 78 79 <script setup>
preload.js 上一节提到了 preload.js 可以实现一些 web 无法实现的客户端功能,比如读取、保存客户端文件,官方规定,需要上架插件市场的插件,均需要明文 preload.js 以便审核,这里的需要用到的核心能力就是读取和保存用户文件了,这里针对读取和保存也做了收口,减少由于业务层 BUG 穿透过去影响系统正常运行的可能性。
1
2
3
4
5
6
7
8
9
10
11
12
13
14
15
16
17
18
19
20
21
22
23
24
25
26
27
const fs = require ('fs' );console .log ("preload js loaded" )window .readMarkdownFile = function (path ) {if (path.match (/\.md$/i )) {return fs.readFileSync (path, {encoding : "utf-8" else {return "" ;window .writeMarkdownFile = function (path, content ) {if (fs.existsSync (path)) {if (path.match (/\.md$/i )) {writeFileSync (path, content)return true ;else {return false ;else {writeFileSync (path, content)return true ;
App.vue 在业务层中即可调用经过 window 变量暴露出来的 readMarkdownFile 和 writeMarkdownFile 方法,使用 utools 的钩子函数(onPluginEnter )即可识别入口为复制了 markdown 文件还是直接打开。
1
2
3
4
5
6
7
8
9
10
11
12
13
14
15
16
17
18
19
20
21
22
23
24
25
26
27
28
29
30
31
32
33
34
35
36
37
38
39
40
41
42
43
44
<template>
打包 upx 或发布到插件中心 调试无误后,点击打包为 upx 即可自行安装测试或分发
常见问题和总结 不论是使用 webpack 还是 vite ,打包时一定要注意打包路径(base: “./“),因为 utools 需要根据相对路径索引打包资源,否则调试模式下是好的,只要发布为 upx 就出问题。 开发 utools 插件上手也很快的,本博客对应的插件在基础框架引入后,开发、调试、编写文档的时间不到六小时。 最后,祝 utools 越做越好,完善 utools 插件生态的人越来越多,星星之火可以燎原。

 而在使用的同时,也想为社区出一份力,实现一些插件为自己为他人提供更多的便利,Utools 为实现多端兼容,主要使用 JS 开发插件,界面 UI 与组件交互与传统的 web 开发别无二致,只不过可以利用更多的系统能力去做传统 web 开发不能做到的事情。
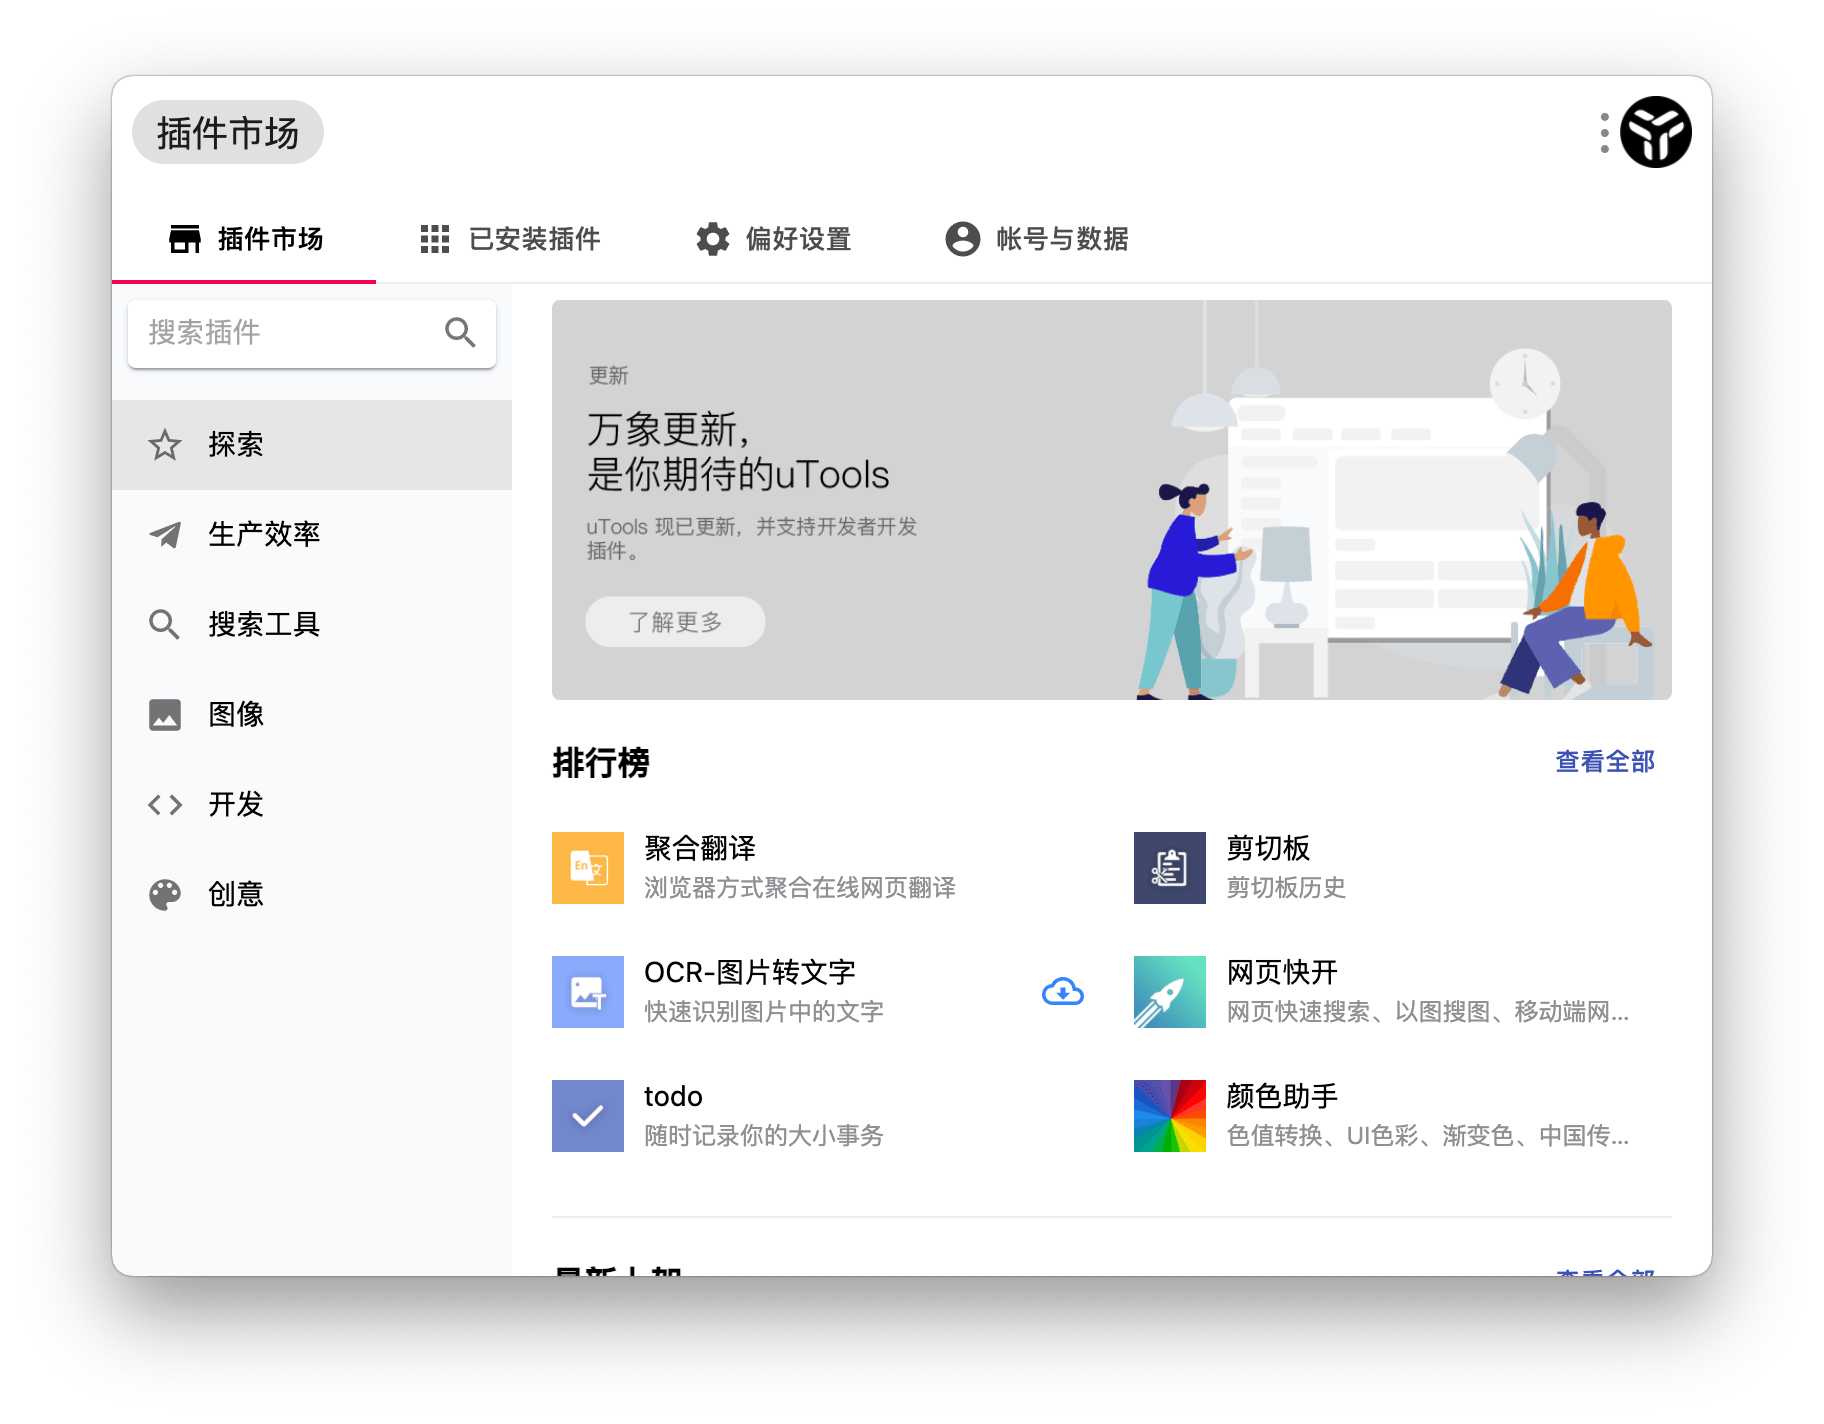
 具体代码见: Github:https://github.com/wangerzi/utools-vue3-markdown-editor Gitee:https://gitee.com/wangerzi/utools-vue3-markdown-editor 界面效果如下:
 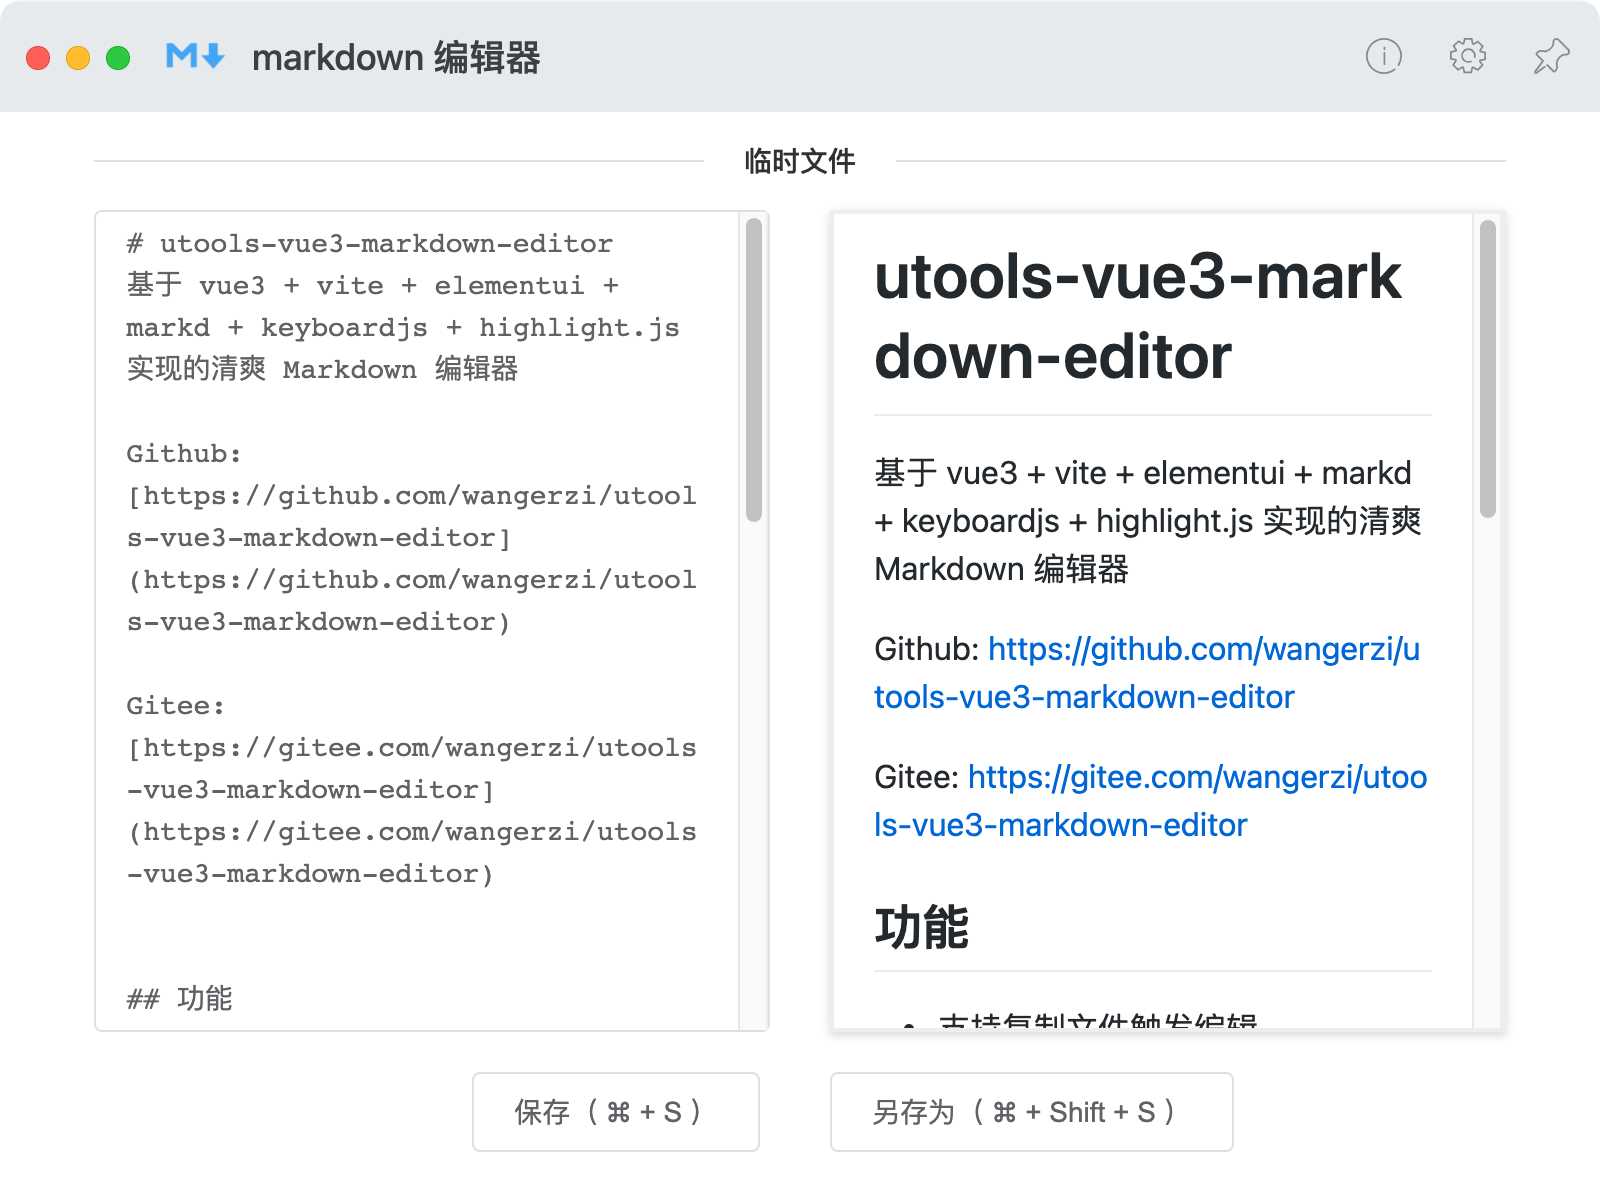 还有一些优秀的开源插件可参考: https://github.com/xiaou66/utools-pictureBed https://github.com/xkloveme/utools-calendar https://github.com/in3102/upassword
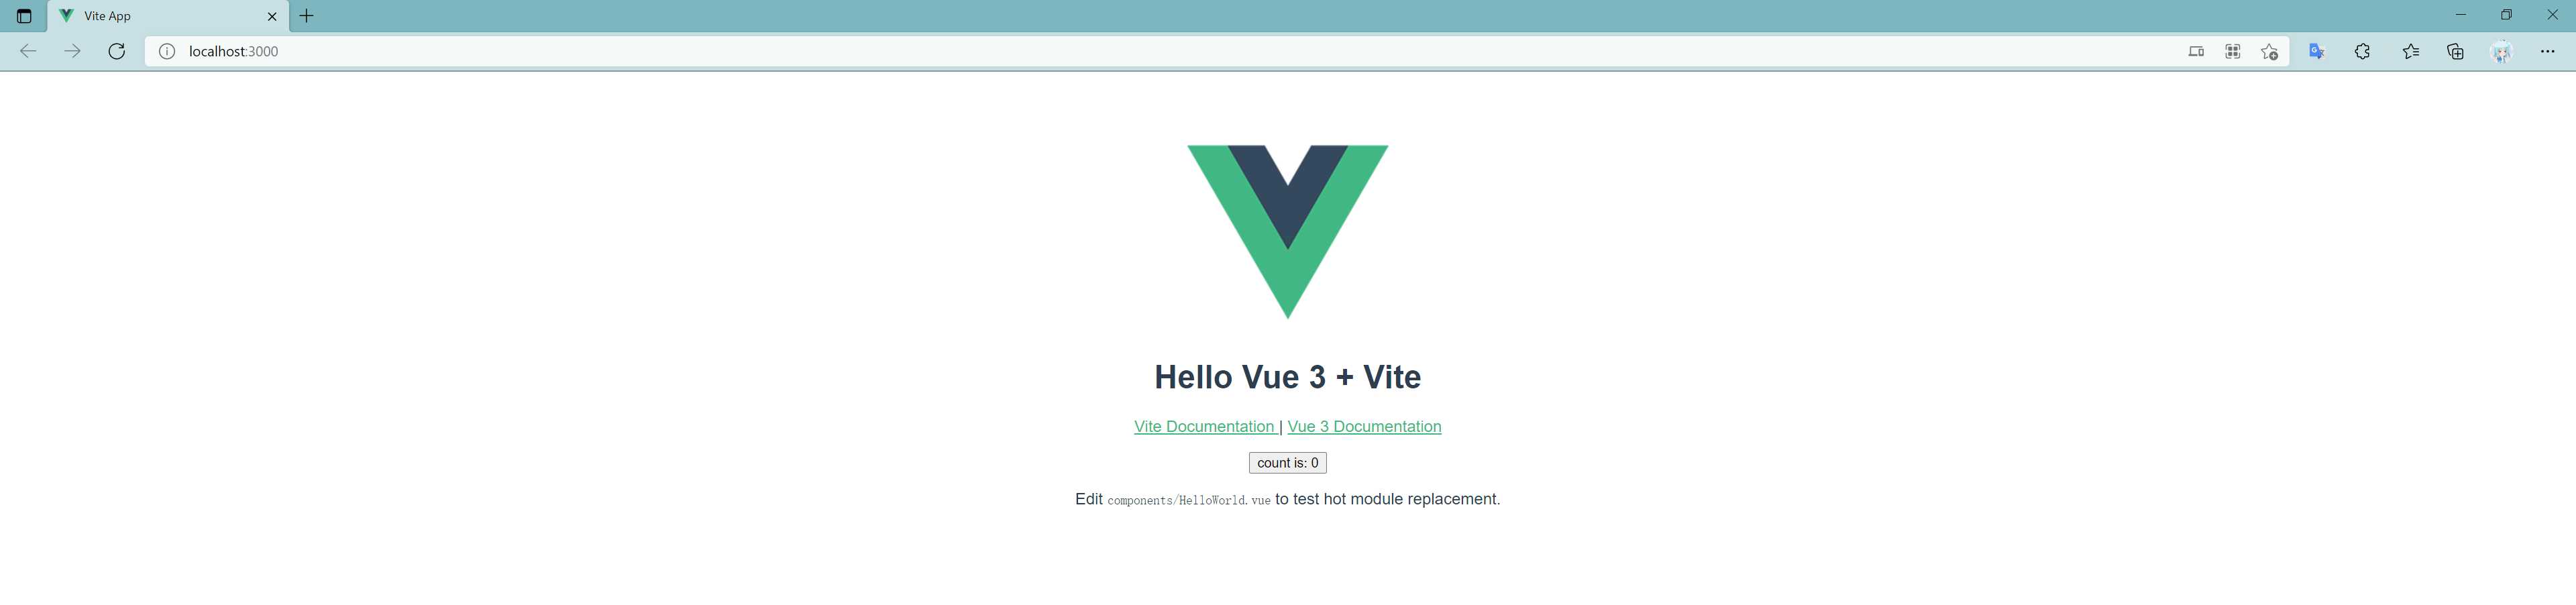

 上一步
上一步 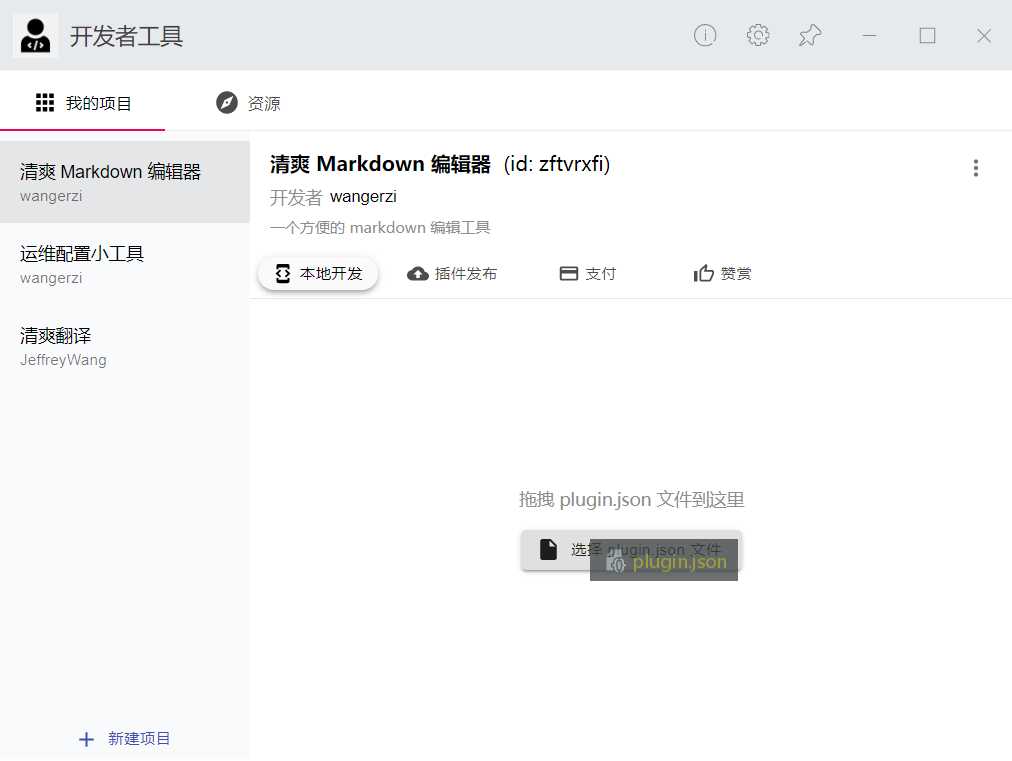
 由于是调试模式,并且我们在
 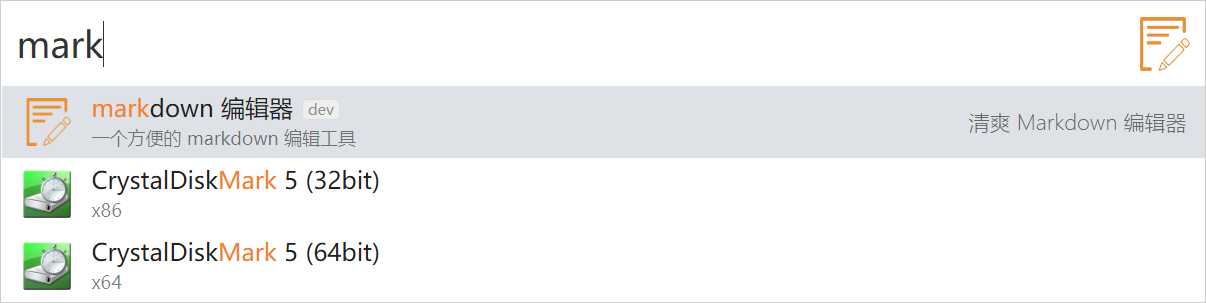 进入插件后,点击右上角按钮或者 ctrl+sfhit+i 可进入开发者模式,开发者模式中可以看到
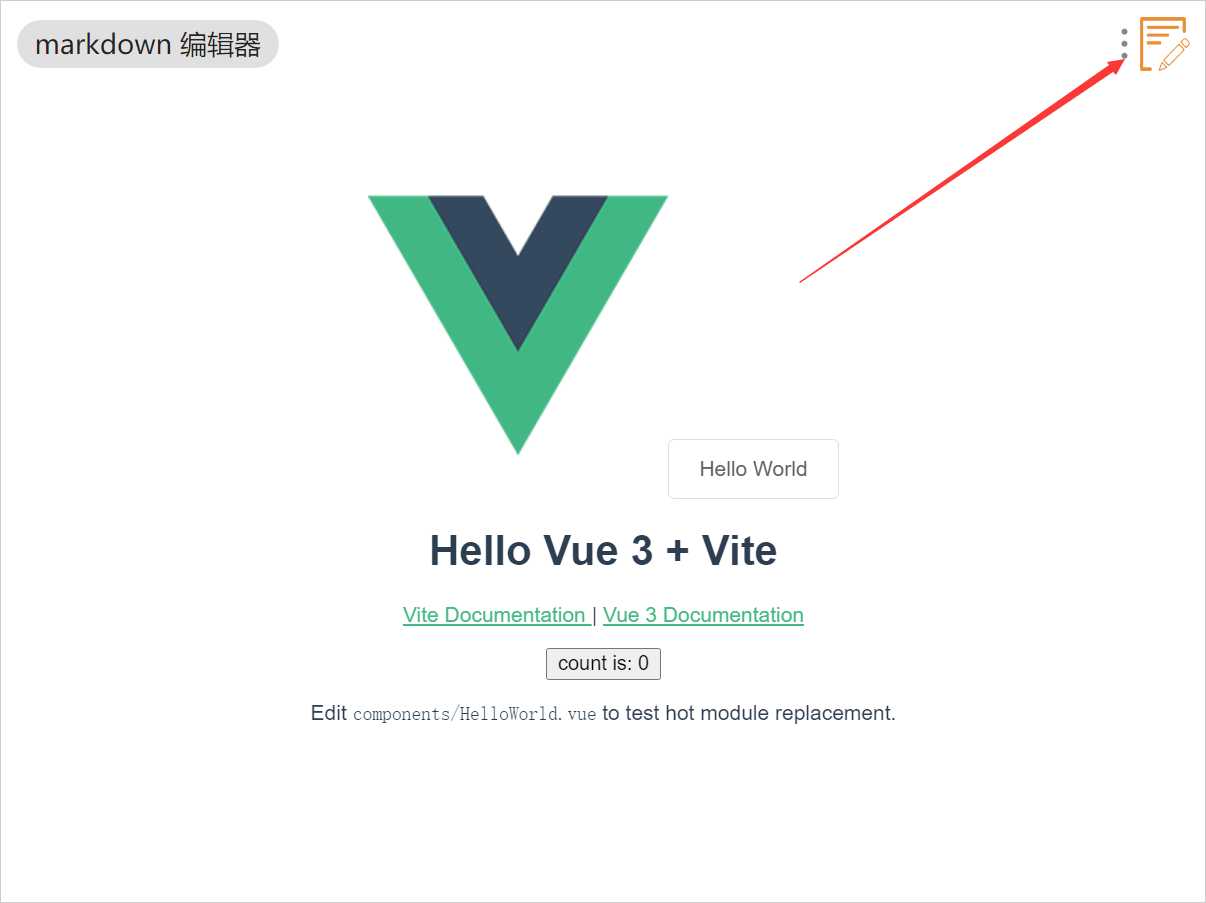

 也可以在『插件发布中』点击发布插件,填写相关信息,审核后即可在插件市场看到发布的插件。